Installing additional SSD in Mid-2010 27" iMac By: Tobias Wolfgang
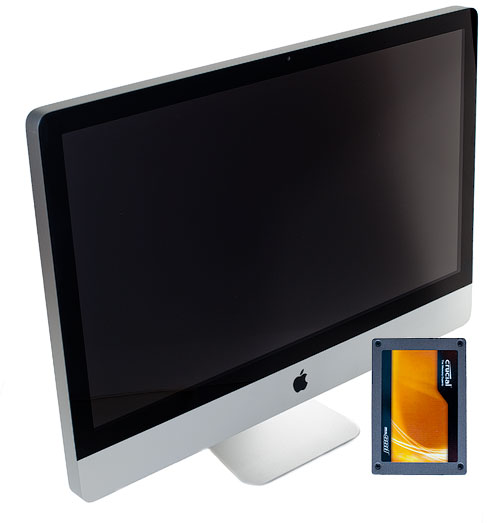
The 27" version of the Mid-2010 iMac is available with an additional 256 GB Solid State Drive for a small extra fee of $750. As I already owned an 160 GB Intel X25 G2 SSD I wanted to use this in my new iMac as well. There is several information on the web, how to replace the hard disk or the optical drive with a SDD, but information about adding a SSD without losing the hard drive and the optical drive is very rare.

spare parts
The problem is, that all iMac which haven't been ordered with the built-in SDD miss the mounting option for the SDD and the cables. So you have to order them separately. Fortunately http://applecomponents.com has them in stock. You will need three parts:
- The power cable 922-9531 with connectors for logic board, LED backlight, hard disk and SDD which replaces the old power cable.
- The mounting kit 922-9485 for the SSD which will replace a small plastic part
- The SATA data cable 922-9538 which connects the SSD with the logic board
This will be a total of $57 plus shipping (I paid about 72 € in total with shipping to Germany plus 13 € taxes at the customs). Besides of that you will need four very flat screws to tighten the SSD to the mounting kit. As tools you should have
- a T10 Torx screwdriver
- a Phillips #2 screwdriver (to open the memory bay)
- two paperclips
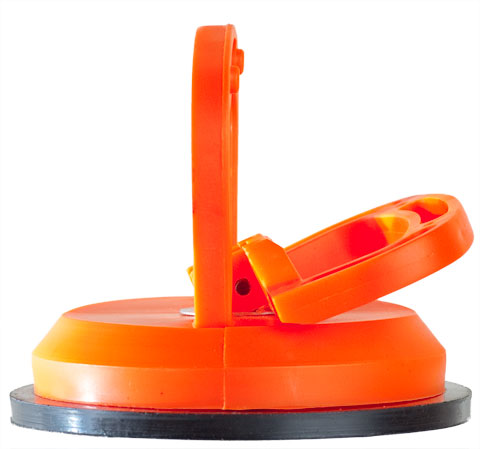
- two suction cups
- a pair of tweezers
- something to clean the LCD
The whole installation isn't very difficult if you act very careful and keep a log of every screws and cable where they came from. It is very useful if you get a friend of yours to help you, as the display and the logic board are very heavy. I had some help from Steve, who's Job it was to take all the pictures you see in this guide (Thanks a lot for the help!) and help with the organisation of all the screws and boards and he was my 3rd and 4th hand whenever needed.
Before starting, open the memory bay of the iMac on the lower side:

memory bay
At first, you have to open the iMac and remove the display. It might be a good idea to lay down the iMac on a towel or something to avoid scratches in the aluminium:

suction cups at iMac display glass
Put the mac this way, so the top of the iMac will face towards you.
Position the two suction cups in the upper left and right corner (You'll
get these in every do-it-yourself store. I paid about 7 € for each).
The display is fixed with small magnets, so no screws. Pull up the
suction cups upwards to lift the glass up to about 45 degrees. The pull
the whole glass towards you to remove it entirely from the iMac. There
are a few metal clips connecting the display with the lower part of the
iMac. Store the display in a safe position, for example on the floor
using your original iMac
wrapping:

display glass in on iMac wrapping
To remove the display you have to remove 4 screws at each side of the LCD screen:

display screws at one side
To lift up the LCD we built a small tool using two paperclips:

tools made of paperclips to lift LCD
Now put the paperclips tools under the edges of the display and pull it a few centimeters upwards. Then put something between the display and case to fit it in the upper position:

Lifting the LCD
Before the LCD can be removed, there are four cables which have to be disconnect. The first one is connected to the LCD back-light board in the lower right corner:

LCD backlight sync cable
Be careful as this cable was stuck on the back of the iMac and so we could lift the LCD only for a few centimeters. We removed the cable from the bottom with a pair of tweezers and the lifted to LCD to about ten to fifteen centimeters. Then it was easy to unplug the cable.
The next cable is the data cable to the LCD. You have to squeeze the to display connector arms together and the pull to remove the cable:

LCD data cable
Now we need to remove the LCD temperature sensor next to the data cable:

LCD temperature connector
The last one is the LCD back-light cable connected to the LCD back-light board on the right side:

LCD backlight cable
After all cables connected to the LCD have been removed, we can remove it from the iMac and put it somewhere in a safe place. Now we have a look at everything inside the iMac:

displayless iMac
In the lower right we can see the LCD back-light next to the power supply. In the lower middle is the hard disk and the AirPort card located. On the left there is the optical drive and the whole upper part is the logic board. We will have to remove nearly everything as we need to insert the SSD mount below the heat sink between the hard disk and the optical drive.
We start by remove the hard disk. Unplug the 3 cables (power, SATA data and temperature sensor) and remember the position of the temperature sensor cable (You'll need it later). Before lifting the hard disk we have to remove 2 screws:

hard disk
Now lift up the hard disk in the lower part and then pull it towards you to remove it. The next step is to remove the optical drive. After removing the 4 screws,

optical drive
remove the combined power/data cable from the drive and the temperature sensor from the logic board.

optical drive
After removing the optical drive remove the screw from the fan next to it and unplug the cable from the fan. It is located beneath the ribbon cable to the RMT I/O connector:

fan
Now the continue on the lower right side by removing the power supply. There are four screws and two connectors which need to be disconnected:

power supply
The LCD backlight next to the power supply has also four screws, but only one cable:

LCD backlight
Now remove the two plastic parts located between the power supply, the LCD back-light and the heat sink (Sorry, I didn't take a separate picture of them). Then it's time to remove the AirPort card. Unplug the two antenna connectors by pulling the upwards (should be very easy) and disconnect the cable to the AirPort on the logic board. You have to remove the sticky tape and the pull the connector upwards. Then remove the two screws fixing the AirPort and remove it:

AirPort card
Under the black apple logo on the front of the iMac there is an infrared receiver hiding. After unplugging the connector on the logic board, pull to remove the infrared receiver board.

IR connector
The last step is to remove the logic board. There are eight screws to remove:

logic board screws
Now unplug all left over cables to the logic board. The RMT I/O connector in the upper left corner:

RMT I/O
The SD card reader below the RMT I/O connector:

SD card reader
The microphone connector between the RMT I/O and the SD card reader connector:

microphone connector
And the two speaker connectors right of the microphone connector. Notice that right speaker connector has five pins where as the left speaker connector has only four pins. You won't be able to mix them later :):

speaker connectors
In the upper right corner you will find the connector for the power button:

power button connector
And two centimeters right of it the CPU fan connector:

CPU fan connector
In the lower end of the logic board are the skin temperature sensor:

skin temperature sensor
And a bit left of it are several sensors. You need to disconnect the hard disk fan, camera and Bluetooth connector. The hard disk temperature sensors doesn't have to be disconnected as we already removed the other end of the cable from the hard disk.

hard disk fan, camera and bluetooth connector
The last remaining connector should be the AMB temperature sensor:

hard disk fan, camera and bluetooth connector
Now you should be able to remove the logic board by lifting it a little bit at the lower side and then pulling it towards you. Be care as there are some cables on the lower side of the board (power cable, HDD data cable). Now your iMac (if you still want to call it iMac ;)) should look like:
![]()
empty imac
In the next step we remove the plastic part where the SSD mount will fit in:

old mount without SSD
You have to remove one screws and to remove a little bit of the sticky tape from the cables which are routed over the plastic. The pull the plastic upwards and remove it. The plastic is glue on the bottom of the iMac so you will have to pull a little more intense.
Now you will need to get four very flat screws to mount the SSD into the new plastic mount:

SSD mount
Test if the screws are flat enough so that new mount sits perfectly. Now install the mount in the position of the old mount and route the thin cable below the mount. Tighten it with the screw from the old mount. Before reinstalling the logic board we have to swap the power cable and to install the new SSD SATA data cable:

logic board power cable

SSD cables
The straight connector of the SATA data cable must be inserted in the logic board. Now we can reassemble everything:
- Insert the logic board and check that all cable you removed are not hidden somewhere under the board.
- Plug in the SSD data connector into the SSD and plug in the power connector into the SSD. There are two SATA power connectors on the power cable. The middle one with four pins has to be used for the HDD drive and the other one with only two pins for the SSD.
- Tighten the logic board with the eight screws you removed and route the power and SATA cables correctly.
- Connect all the connectors to the logic board:
- RMT I/O
- SD card reader
- microphone
- left/right speaker
- power button
- CPU fan
- skin fan
- camera
- Bluetooth
- AMB temperature sensors
- Reinsert the infrared receiver board the connect it to the logic board
- Put back the two plastic parts from the power supply and LCD back-light
- Connect the power cable to the LCD back-light, glue it to the bottom of the case and tighten the LCD back-light
- Connect the power cable and the other cable to the power supply and tighten it
- Install AirPort card and check that the power cable is correctly routed beneath it. Plug in the two antennas.
- Insert the fan in the upper left corner and connect it.
- Insert the optical drive and connect the data cable and the temperature sensor.
- Connect the power cable, the SATA data cable and the temperature sensor to the hard disk. Tighten it.
- LCD back-light
- LCD temperature sensor
- LCD data cable
- LCD back-light sync
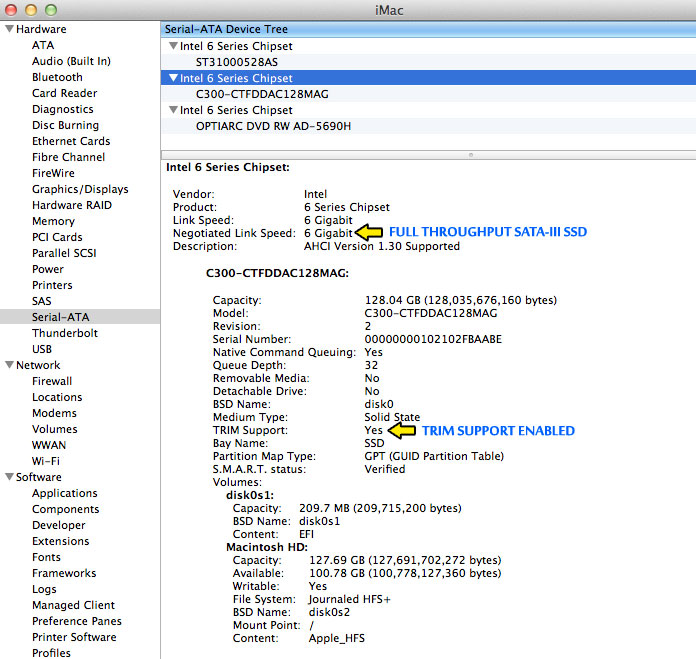
Now, pray, and press the power button. If you've everything correctly your iMac should boot and you should see the SSD drive in the disk utility:

disk utility
If you got mixed up with all the different screws, this may help you:

screws I

SUMMARY By: Brian Tobey
The 2011 iMacs provide the capability to use solid state drives
(SSD). Although Apple offers an SSD option when purchasing an iMac, it
comes at a huge cost. The motherboard features two SATA-III
connections. SATA-III provides faster throughput speed allowing SSDs to
excel.
This guide illustrates the steps to add an SSD drive to your 2011
iMac. I attempted to minimize the disassembly as much as possible to
make it easier and less time. The procedure does not require the
motherboard to be removed completely. However, you will need to slide
it out slightly to get access to the spare SATA connector.
To install an SSD on a 2011 Apple iMac is not easy, but not hard
either. And after installation, you'll feel more comfortable with your
iMac hardware. Some prior computer experience is recommended along with
patience. The total time to complete is 3 hours approximately.
This procedure explains how to install an SSD. This is not a
replacement for the original hard drive, but instead an addition. The
procedure requires some dis assembly to connect a SATA cable to the
spare SATA-III connector located underneath the motherboard. The iMac
has two SATA-III connectors, one is already in use by the orginal 1TB
hard drive.
Once the SATA cable is installed, it is easy to install and
securely mount an SSD drive under the DVD drive. Finally the iMac is
reassembled.
This procedure was performed on a 27" iMac which has slightly more
room to install an SSD. Although it may be different for a 21.5" iMac, I
know it is possible, as I read that many people have had success across
the web.
DISCLAIMER
This procedure is intended for educational purposes. Performing
the actions herin may void Apple's warranty. The reader is cautioned.
TOTAL COST
iMac: ~$1600
I purchased the iMac 27" base model (MC813LL/A), which comes with a
2.7Ghz processor, 4GB of memory, and a 1TB hard drive. Apple will
charge you $1699 for this model + tax. I purchased mine from Adorama for much less, also consider Amazon.
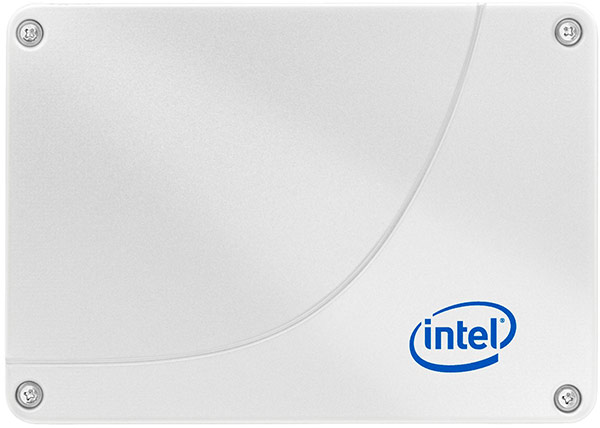
SSD: ~$200 (128GB)
I also purchased my SSD from Amazon. NOTE: The SSD shown in this guide is the older Crucial model (C300), which only acheives half the speed of the newer Crucial m4s.
Total Cost: $1800!
REQUIRED TOOLS
SUCTION CUP
TORX TOOLSET T5-T10

SCREW DRIVER

REQUIRED PARTS
13 PIN F to 22 PIN F SATA CABLE
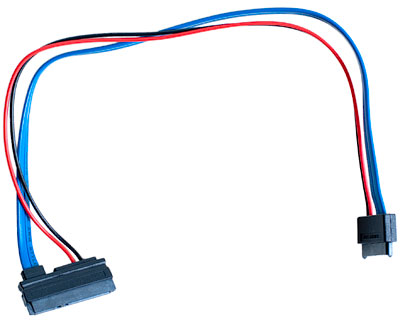
eBay
and
Amazon
have these available for purchase.
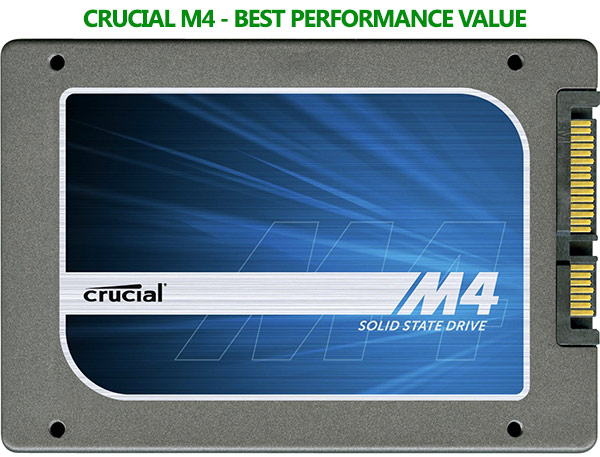
RECOMMENDED: SOLID STATE DRIVE (SSD)
There are many SSDs on the market today. When chosing an SSD, be
sure its SATA-III to take full advantage of data throughput. I bought a
Crucial m4.
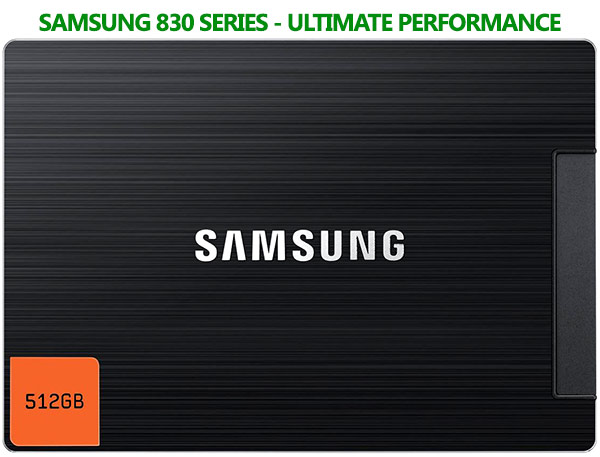
The m4 has great performance and is more affordable. However, if you
are looking for ultimate performance, I'd go with the new Samsung 830 Series.

STEP 0: REMOVE MEMORY MODULES (OPTIONAL)
Some people that have followed this guide recommend removing the
memory (RAM) modules first. This helps when repositioning the
motherboard. Although I did not do this, it is probably a good
suggestion, as I did have trouble sliding the motherboard back into its
orginal position. I will list this step as optional because it is not
required, but may be helpful. See below for more information on adding memory.
Also, by completing this step first, the motherboard will be more
maneuverable, and you may not need to disconnect all the connectors
listed in STEP 5.
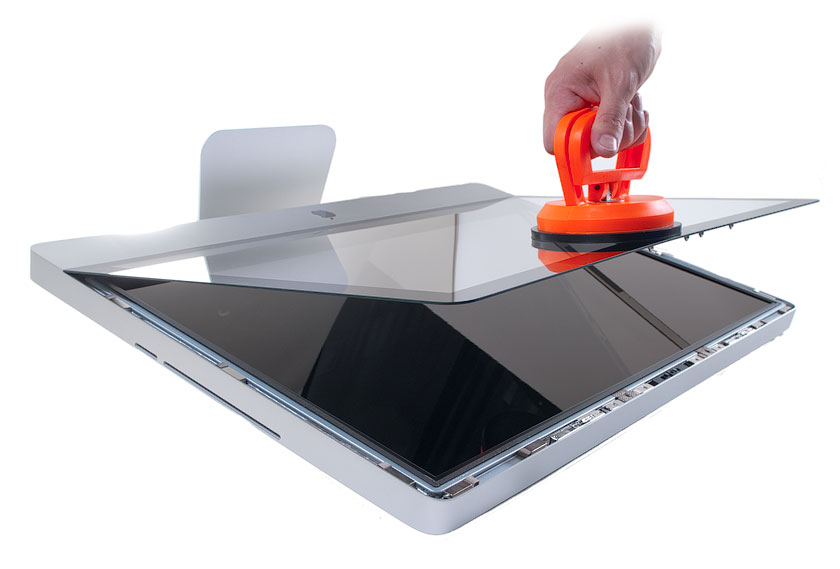
STEP 1: REMOVE GLASS
Use a suction cup to remove the front glass of the iMac. It is
magnetically held in place. Be careful, the suction cup I used here
left slight residue. Try using a smaller one. It does not require much
effort to lift the glass.
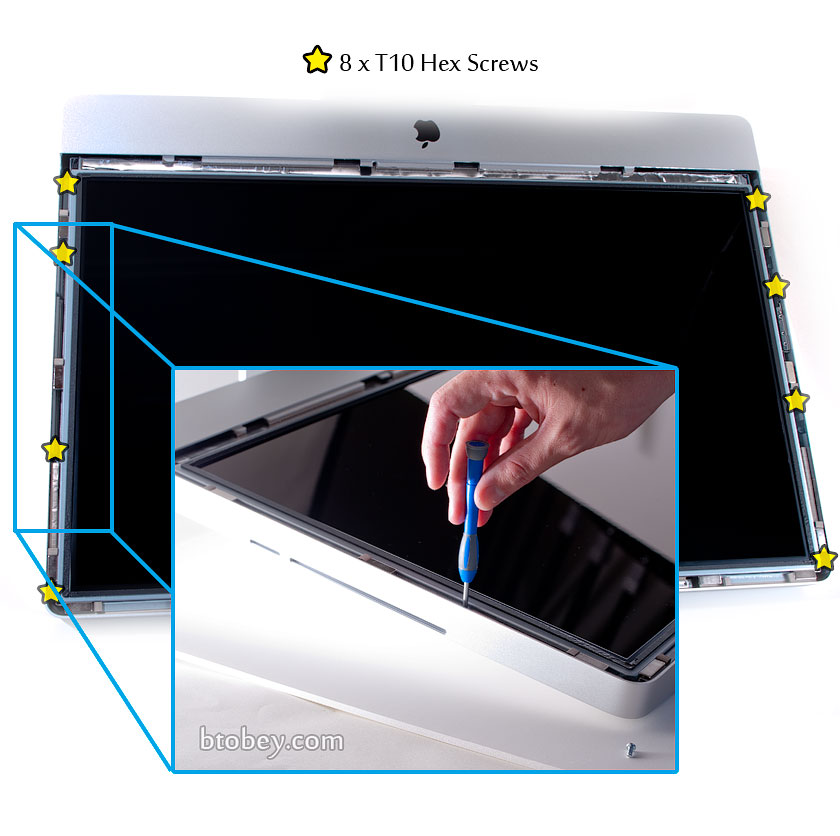
STEP 2: REMOVE LCD SCREWS
Use a T10 Torx driver to remove 8 screws along the side of the LCD.
STEP 3: REMOVE LCD
Carefully use a screwdriver to help lift the LCD up enough to use your fingers. Now DO NOT LIFT MORE THAN 2 INCHES!
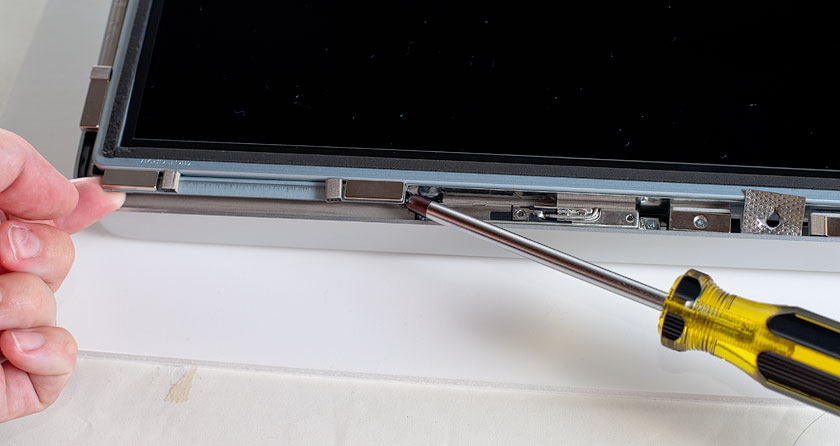
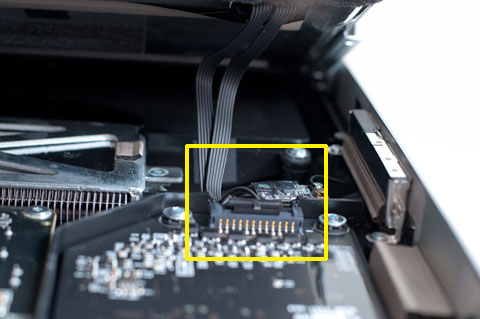
On the side is a small connector. Disconnect it and raise the LCD another few inches.
On the same side, there is another connector further in. Disconnect it.
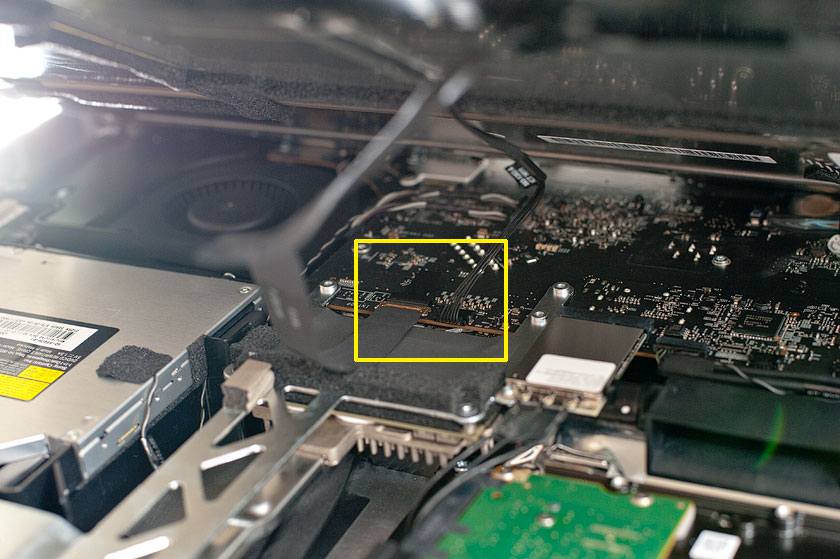
Lastly, on the other side, further in, there are two additional
connectors. One is easy to disconnect. The other requires lifting the
black label to release the ribbon cable connector. Now disconnect it.
Now you should be able to remove the LCD screen and place it aside.
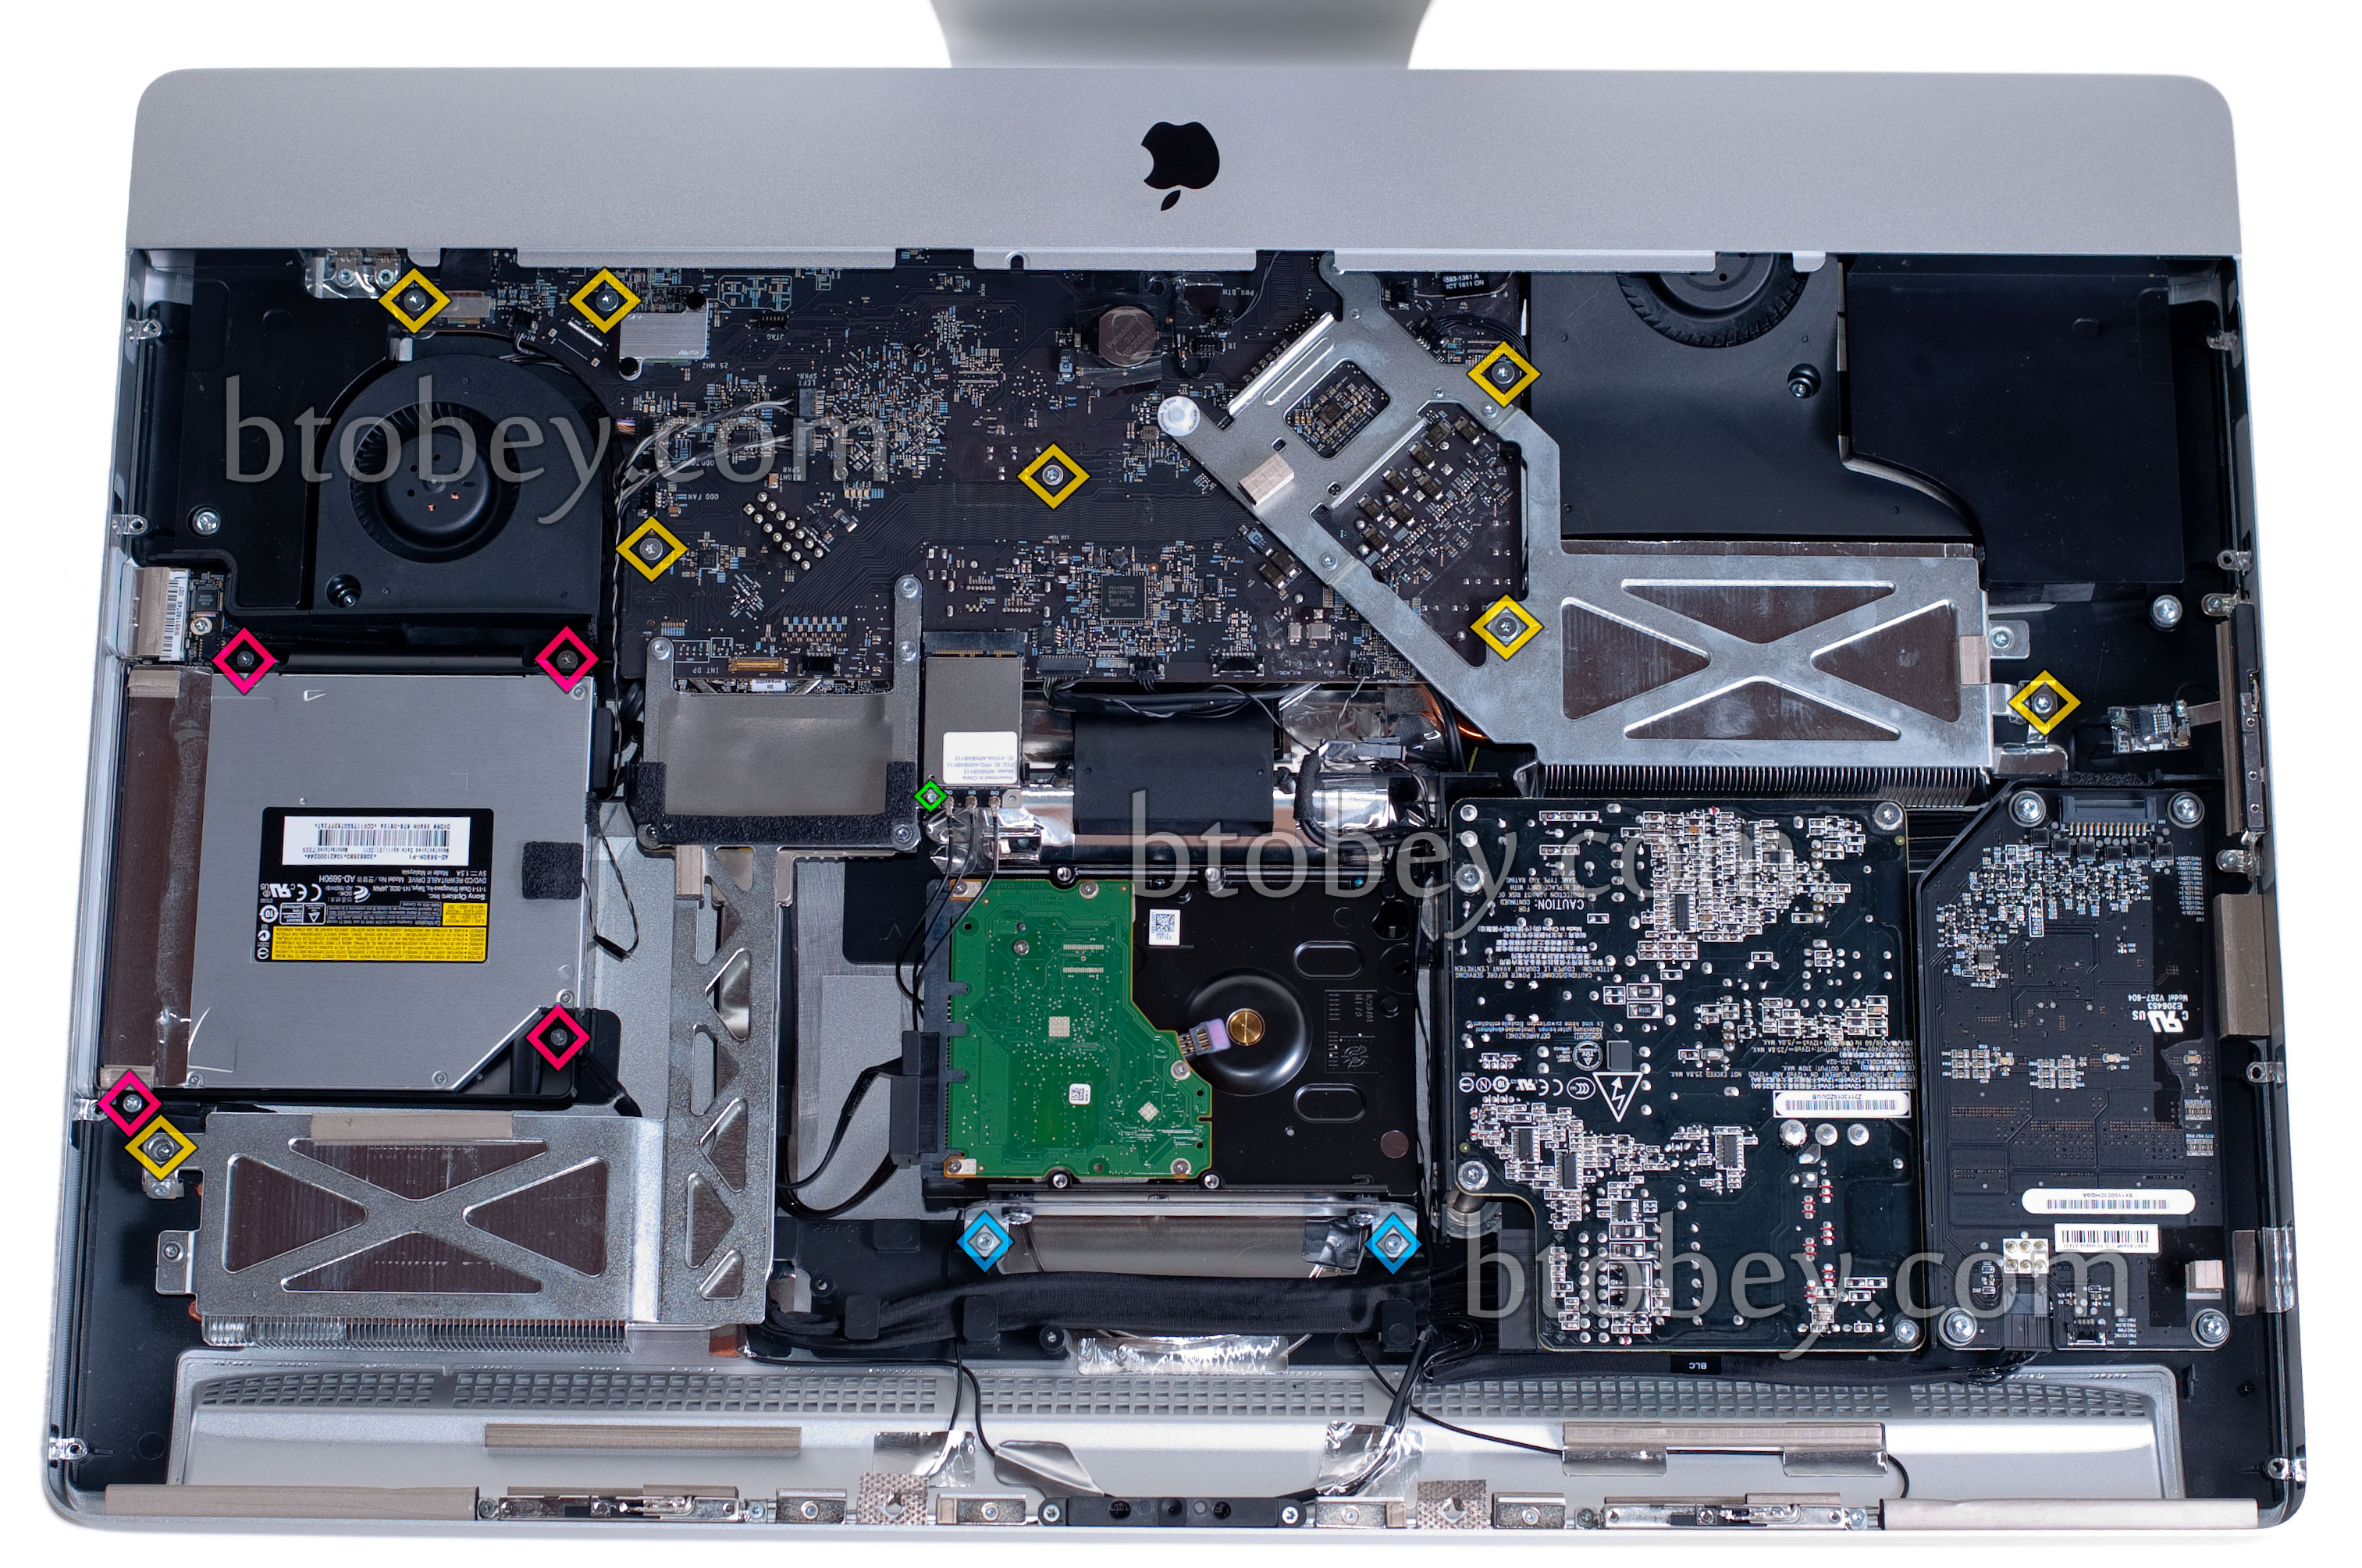
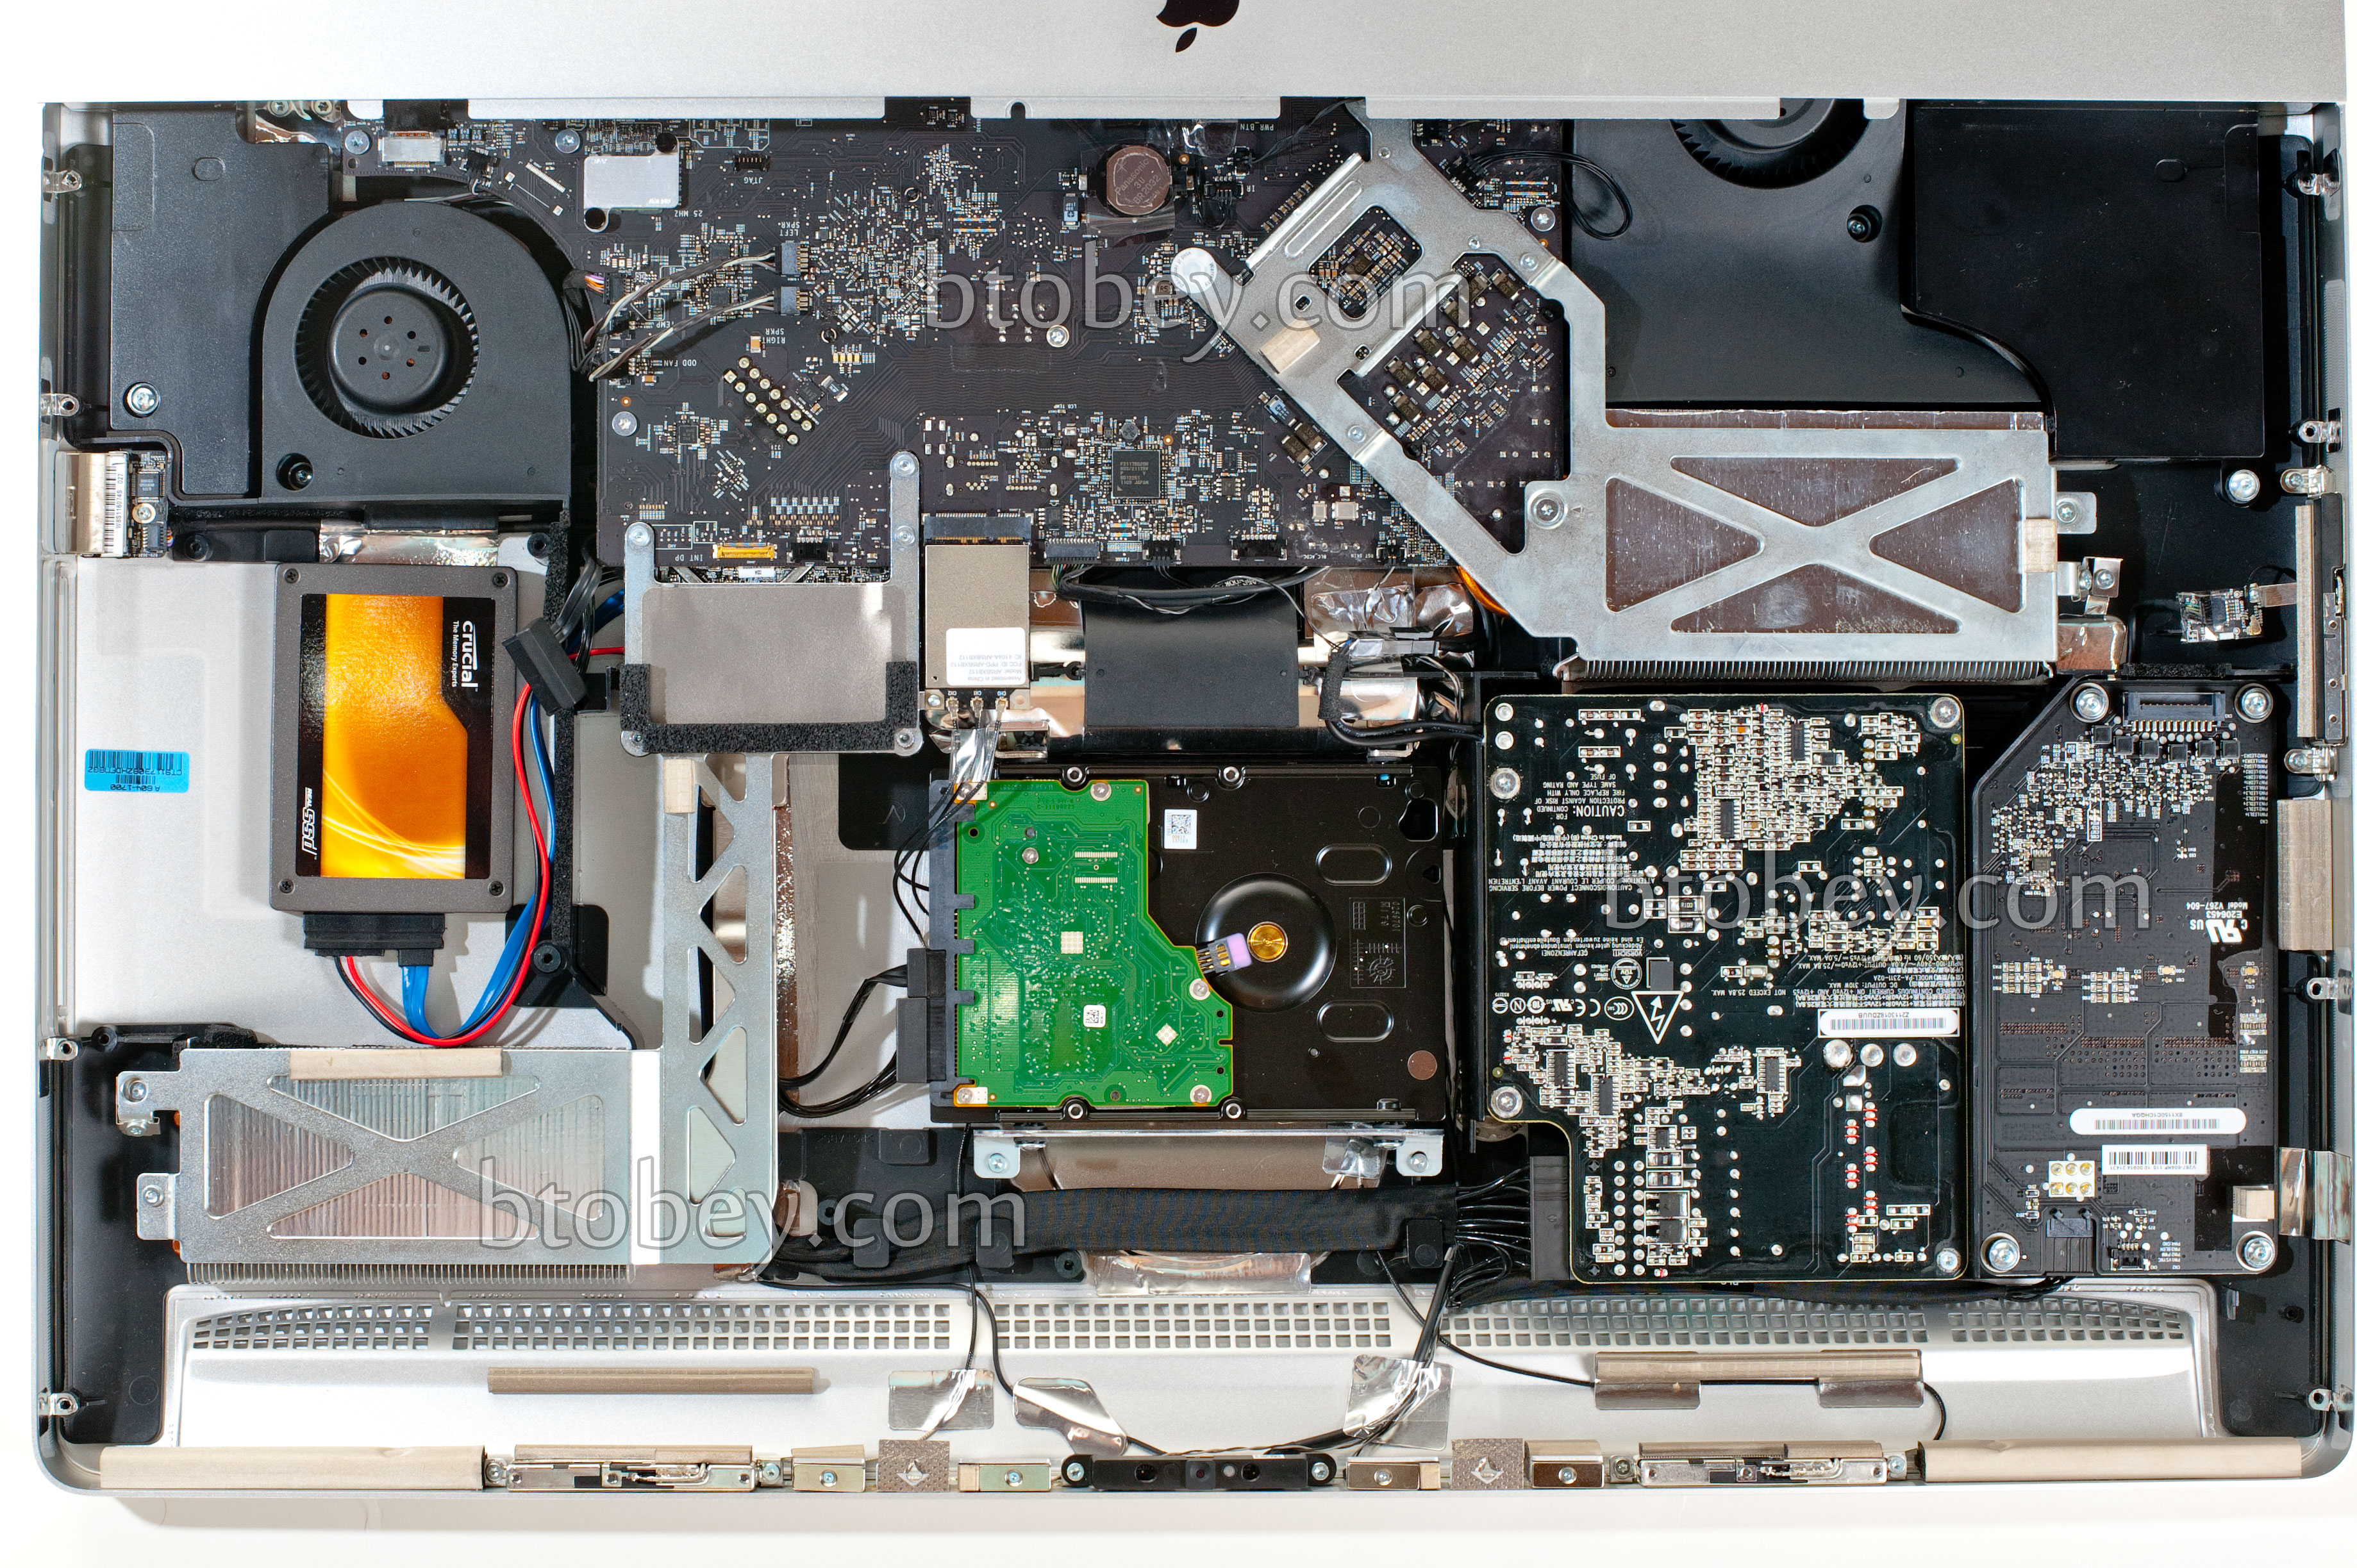
STEP 4: UNSCREW COMPONENTS AND MOTHERBOARD
Unscrew all the screws marked here. The 8 screws marked in yellow
are for the motherboard. The 4 screws marked in red are for the DVD
drive. The screws marked in blue are for the hard drive. The one
marked in green is for the wireless. Click to enlarge photo.
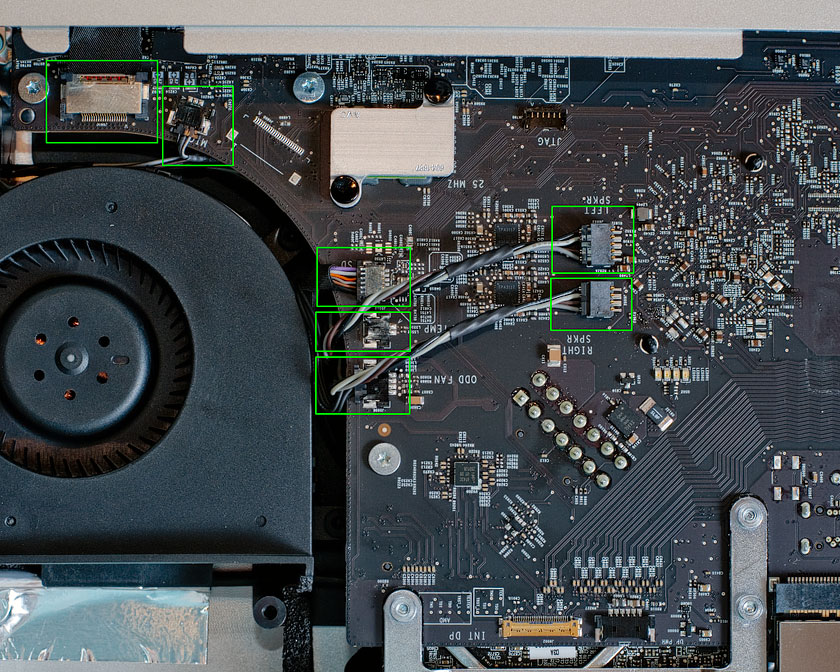
STEP 5: DISCONNECT CONNECTORS
Disconnect a total of 14 connectors on the motherboard (see the 2 photos below).
The upper left ribbon cable (positioned above the fan in the photo
below) is optional, as I did not have to remove it to slide the
motherboard out. Just remember that if you do not remove it, not to
yank it out!
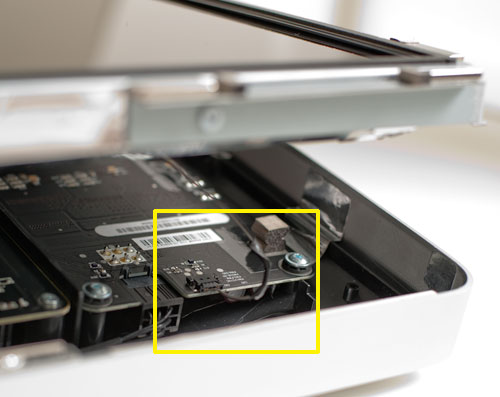
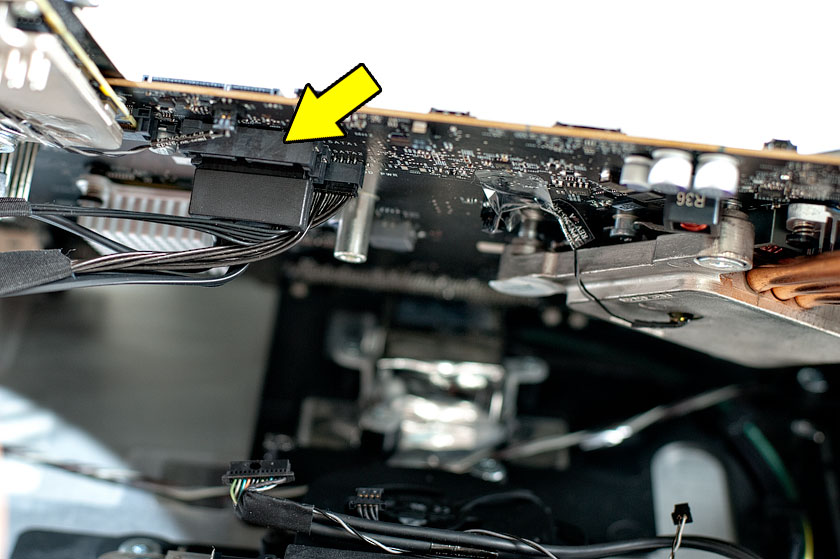
In the photo below, I marked a yellow arrow. This indicates the IR
sensor cable. The IR sensor can be slid out once this cable is
disconnected.
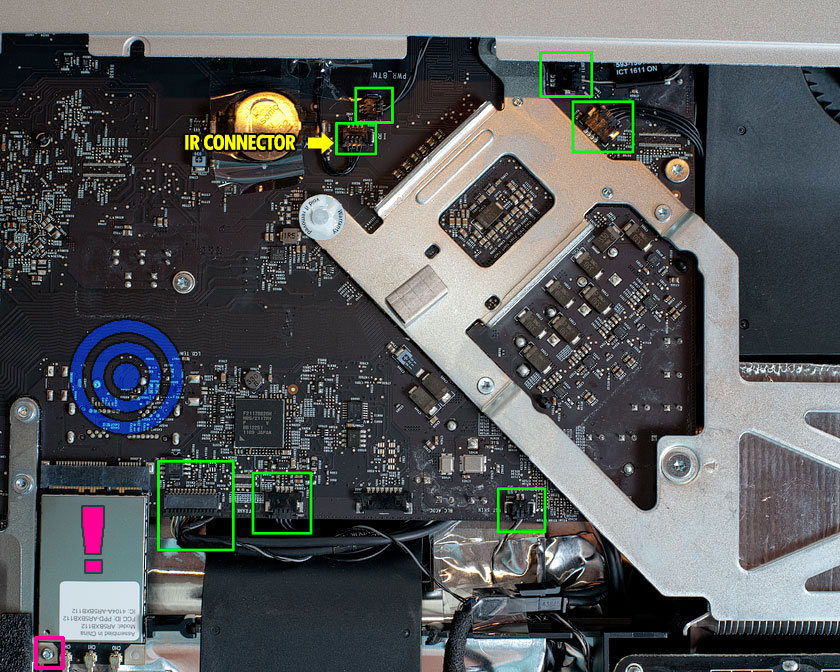
 Remove this wifi device (marked in pink) from the motherboard. First
use a T6 to unscrew the one screw marked in the pink box. Then unplug
it from the motherboard. Be careful! Wires are still attached to the
back chassis so just move it over for now so it is free from the
motherboard.
Remove this wifi device (marked in pink) from the motherboard. First
use a T6 to unscrew the one screw marked in the pink box. Then unplug
it from the motherboard. Be careful! Wires are still attached to the
back chassis so just move it over for now so it is free from the
motherboard.
 The
blue bullseye represents where the SATA connectors are just underneath
the motherboard. You cant see them from this picture, but they are just
underneath.
The
blue bullseye represents where the SATA connectors are just underneath
the motherboard. You cant see them from this picture, but they are just
underneath.
Now disconnect the 1TB hard drive and remove it. Then disconnect
the DVD drive (ODD) and set it aside as well. STEP 6 describes how to
slide out the motherboard.
STEP 6: INSTALL SATA CABLE
Now if you haven't done so already, remove the IR sensor under the
Apple logo. It slides out easily. Put is aside for now.
Once the IR sensor is out of the way, slide the motherboard out
carefully and lift it up slightly to gain access to the connectors
underneath. Now underneath the top side of the motherboard is the hard
drive SATA connector and a SPARE SATA connector. Plug in your 13 pin
female SATA plug into the SPARE and route it towards the DVD drive.
Now that the cable is installed, carefully slide the motherboard
back into its original place. This is the trickiest part. Try to align
the rear connectors first. This took me 10 minutes of frustration and I
had to stand the iMac back up to do it and see what I was doing. Use a
bright light. Once installed you can put the connectors back in place
and start screwing some screws to keep it in place.
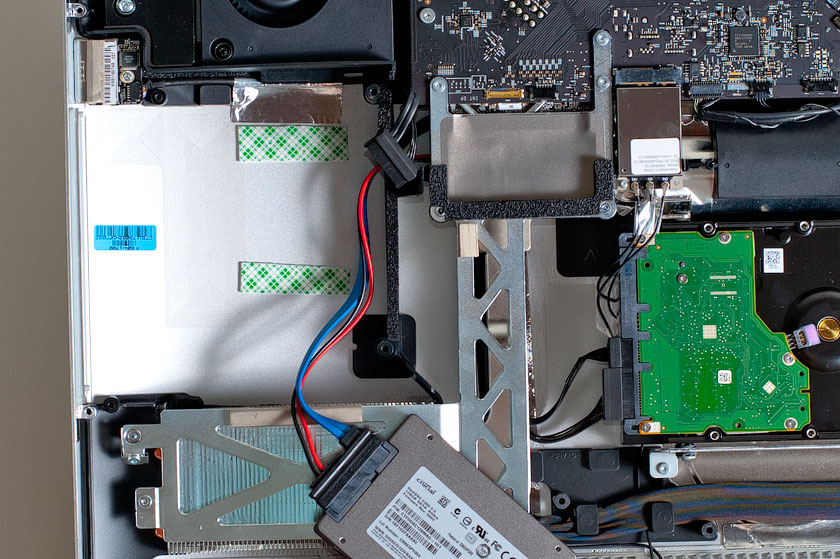
STEP 7: INSTALL SSD
Route the SATA cable through the pressure wall. There is a small
break which is flexible an easy to slide the cable through.
Once the SATA cable is installed, mounting the SSD drive is easy.
I mounted it under the DVD drive (ODD) using some double sided tape.
There is plenty of cooling there as well. Now connect the SSD, mount
it, and re-install the DVD drive. In case the drive fails in the future,
or I decide to upgrade to a faster and higher capacity SSD, I can
easily replace it at this location.
STEP 8: RE-ASSEMBLE
Finally, reconnect all the connectors and tighten all screws that
were removed prior. Install the LCD and tighten the 8 screws. Use a
dust canister to remove any dust that may be on the glass or LCD screen.
Although I left this section short. It is not as difficult as it
seems. Connecting all the connectors was straight forward. Should you
get confused, look at the pictures above to verify the correct
placement.
STEP 9: INSTALL OS-X OR RESTORE BACKUP TO SSD
I restored my previous installation onto the new SSD harddrive
using "Time Machine". To do this, insert your OS-X installation CD that
came with the iMac. Hold down "C" during bootup. Click "Utilities" and
click restore from "Time Machine".
If you prefer, you can install from scratch using the installation CD.
STEP 10: ENABLE TRIM
Trim is required for most SSDs to operate efficiently during data
writes. Apple only enables TRIM on their own specific SSDs. I
recommend enabling TRIM to achieve optimum data rates, unless you are
sure your SSD has sufficient garbage collection. DO NOT USE TRIM ENABLE
APP! I have seen issues with this and it is too generic. Instead, use
some good old UNIX commands. Open up the Terminal and type the
following.
BACKUP ORIGINAL FILE:
sudo cp
/System/Library/Extensions/IOAHCIFamily.kext/Contents/PlugIns/IOAHCIBlockStorage.kext/Contents/MacOS/IOAHCIBlockStorage
/IOAHCIBlockStorage.original
ENABLE TRIM SUPPORT:
sudo perl -pi -e
's|(\x52\x6F\x74\x61\x74\x69\x6F\x6E\x61\x6C\x00).{9}(\x00\x51)|$1\x00\x00\x00\x00\x00\x00\x00\x00\x00$2|sg'
/System/Library/Extensions/IOAHCIFamily.kext/Contents/PlugIns/IOAHCIBlockStorage.kext/Contents/MacOS/IOAHCIBlockStorage
CLEAR KEXT CACHES:
sudo kextcache -system-prelinked-kernel
sudo kextcache -system-caches
REBOOT!
CONCLUSION
The new SSD drive has increased my iMac's data performance. I used AJA
to benchmark my results and I was over 200MB/s on both read and write
speeds. I am very please with the results. The Crucial C300 that I
installed is not the fastest drive on the market. The newer Crucial m4 or
OCZ Vertex 3 will outperform it. However, I was more than pleased with the C300's performance.
I have recently received some emails (thanks Serg) regarding
questions about fan speed issues. These fan issues are related to the
main 1TB hard drive that came with the system. This included hard drive
has a temperature monitoring capability. It is a Seagate hard drive
with additional Apple features. I did not replace or modify this hard
drive because of the discussions I read about others that had issues
doing so. As I understand, replacing or swapping this drive will cause
fan speeds to spin at max speed because the thermal monitoring system
loses temperature information that is unique to Apple drives. I would
leave this alone, and instead, just add an SSD as described in this
procedure.
ADDING MEMORY
After installing the SSD I decided to add more memory (RAM). It was easy. Apple provides a guide to add memory. It is simple. I added G.Skill 8GB for $59. Since the iMac came with 4GB, I had a total of 12GB after adding the 8GB. Make sure you get DDR3 1333Mhz SO-DIMMS (Laptop Memory) unbuffered and non-ECC. This G Skill memory I bought worked fantastic. My iMac is fast and is a great improvement over the stock system.
INSTALLING WINDOWS
Later, I decided I miss some of my windows applications. So I
installed Windows 7 using Boot Camp. I recommend Boot Camp, because
Windows will run natively on the new SSD. This isn't anything new, I
just figured I would throw it in here, as I have recently received some
emails regarding Windows installation.
You can choose to install windows on either hard drive (HDD or the
new SSD). I chose to install it on my new SSD because of the greater
speed, obviously. This will allow me to run both Windows and Mac on the
SSD, and than I can keep pictures and other larger files on the 1TB
hard drive. Apple provides a nice guide to show how to install Windows using Boot Camp.
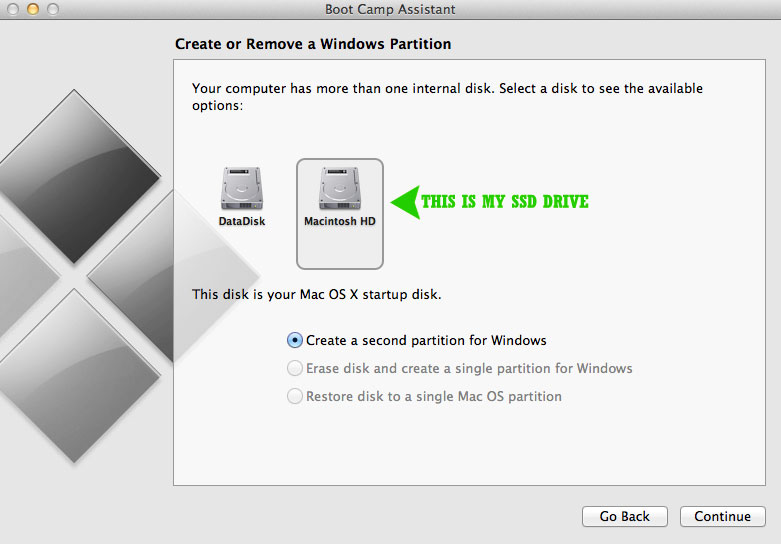
As I said above, I partitioned the SSD drive for Windows and Mac
following Apples guide. When installing Windows, I selected the
BOOTCAMP partition and formatted it to NTFS for Windows installation.
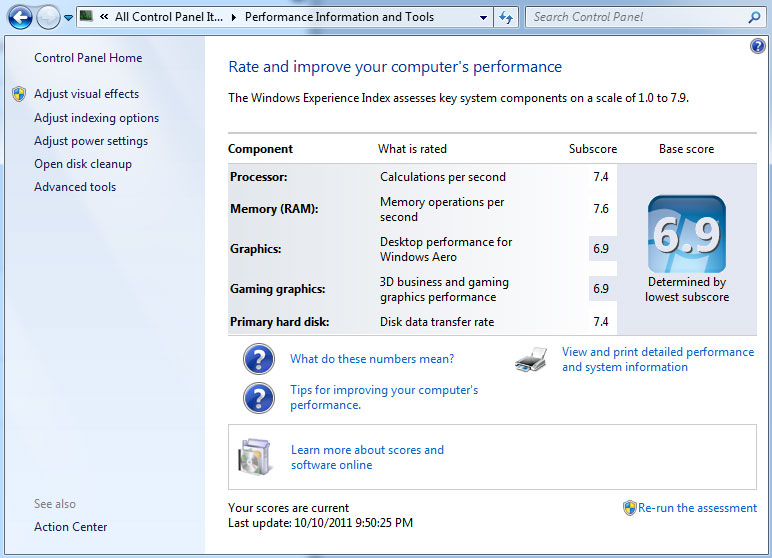
After installing Windows 7, I ran the Windows Experience
Assessment. It gave a score of 7.4 for my SSD, which was the older
Crucial C300. I assure you will get a 7.9 with a Crucial m4. I am more
than pleased with the Windows experience. I love it that I can choose
either operating system and both boot up quickly. Windows 7 boots up
almost as fast as Mac OS-X Lion. Both are snappy and quick.
CONSIDERING RAID
RAID is a mature technology that allows increased performance or
redundancy by using multiple hard drives. Typically, RAID 0 is
implemented on the main hard drive, the one with the OS installed, to
increase data read/write performance. RAID 0 requires two or more disks
and uses its parallel capability to read and write simultaneously.
Jan Ferme followed this guide, but he installed two SSDs to take
advantage of RAID 0. He achieved speeds of over 900MB/s. However, I am
not sure the reliability of his method, as it does not support TRIM.
Read his article here (not english).
CAUTION:
My
understanding of RAID with SSDs is that the TRIM message sent from the
OS cannot get through the RAID controller to the drive. This is true
for intel's 10R chipset. Ultimately the drives wear and performance
degrades significantly. However, modern SSDs use garbage collection to
help systems without TRIM support. I am not sure how effective the
performance of SSD RAID is in the long run. Reliability may be an issue
and I suspect performance will degrade over time.
CONCERNS: SECURING THE SSD
In this procedure I use double sided tape to attach the SSD to the
aluminum casing of the iMac. At the current time, this is the best
solution I can provide. It has held up quite well for me. I have even
transported it on road trips in my car.
Although, there are some alternatives to this double sided tape
method, I am not sure how well they work. You may want to get creative
when you have the iMac open and you can see things for yourself.
One part that may be helpful is the SSD bracket, which Apple sells
for the 21.5" iMac. I believe it can be used for both the 21.5" and
27" models. I am not sure of its use or benefits when adding a
secondary SSD, as I did not use this.
You can find it on Amazon
or
eBay.
VIDEO: BASIC PROCESS
This video was made after following this procedure. It shows the
scope of the work involved. Although it may take a few hours, the speed
performance is quite impressive. Please do not get discouraged. Take
your time.
http://www.youtube.com/watch?v=VFbqAqoB_rE